If you need to add Duo Two Factor authentication to your ASP.Net Project then follow along with the guide below.
1) Visual Studio 2019
2) ASP.Net Core 2.1
3) DUO 30 Day Trial
If you don’t already have a Duo account you can get a 30 day trial account here: https://signup.duo.com/
Create Web SDK
1. Login to your Duo Admin panel https://admin.duosecurity.com/
2. Click on “Applications” in the side Panel then select “Protect an Application”
3. Search for Web SDK, then from the results click on “Protect this Application”.

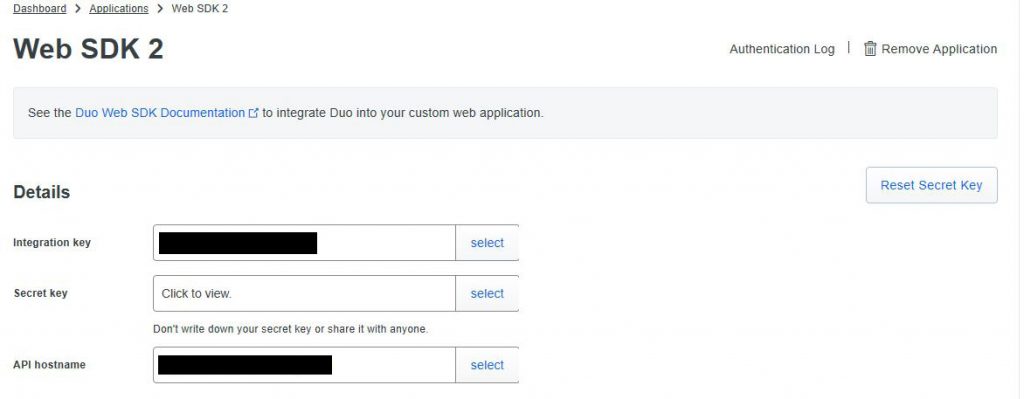
4. Now you should see the following screen that has your key details. You will need this information later.
5. Don’t forget to create a user if you weren’t already prompted to do so. From your Duo admin panel under Users –> Add User. This user needs to match the user you are passing into the GetDuoAuthString() method in the DuoServices.cs file. Whatever user you are using for testing will also need to have a valid cell phone number associated with it for push authentication to work.
Download Asp.Net SDK
1. Now you need to download the ASP.Net SDK from here: https://github.com/duosecurity/duo_dotnet
2. After extracting all the files, open the solution in Visual Studio, build the project, then you will need two files “DuoWeb.dll” which is in the Demo\bin\Debug folder. Add this .dll file to your projects bin folder (this may be a hidden folder) then add a reference to it. You will also need the “Duo-Web-v2.js” file which is located in the js folder. Add each of those files to your project.
In your Home Controller add the following:
string currentUserName = "";

DuoServices svc = new DuoServices();

public IActionResult Index(IFormCollection formFields)
{
//If we have been authenticated we will have an isAuth form value of 1. If not, then redirect to DoAuth.
if (string.IsNullOrEmpty(formFields["isAuth"]))
{
return RedirectToAction("DuoAuth");
}

return View();
}

public IActionResult DuoAuth()
{
//The currentUserName must match an authorized user that you added through the Duo Admin panel https://admin.duosecurity.com/ --> Users
//Strip out your domain name so that you are only passing through the user name.
currentUserName = User.Identity.Name.Replace(@"YourDomain\", "").ToUpper();

//Get the sig_request string
string sig_request = svc.GetDuoAuthString(currentUserName);

ViewBag.sig_request = sig_request;

return View();
}
Create a folder named Services and then create a DuoServices.cs file, then add the following:
Get the Integration Key (ikey) and Secret Key (skey) values from the Duo Admin panel https://admin.duosecurity.com/ –> Applications –> Web SDK and place those values in the GetDuoAuthString() method below.
public string GetRandomForty()
       {
           var result = "";
           var length = 40;

           try
           {
               Random rand = new Random();

               const string pool = "abcdefghijklmnopqrstuvwxyz";
               var uid = new StringBuilder();

               for (var i = 0; i < length; i++)
               {
                   var c = pool[rand.Next(0, pool.Length)];
                   uid.Append(c);
               }

               //Return a random 40 character string.
               result = uid.ToString().ToUpper();
           }
           catch (Exception ex)
           {
               Console.WriteLine(ex.GetType().FullName);
               Console.WriteLine(ex.Message);
           }

           return result;
       }

       public string GetDuoAuthString(string username)
       {
           var result = "";

           try
           {
               //Used for Duo 2 Factor Authentication,
               //Get the ikey and skey values from the //Duo Admin panel https://admin.duosecurity.com/ --> Applications --> WEB SDK
               //Create it if it doesn't exist. Then add those values here.
               string ikey = "";
               string skey = "";
               string akey = GetRandomForty(); //Generate a random 40 character string.

               //Passing the values to the DuoWeb.dll
               result = Duo.Web.SignRequest(ikey, skey, akey, username);
           }
           catch (Exception ex)
           {
               Console.WriteLine(ex.GetType().FullName);
               Console.WriteLine(ex.Message);
           }

           return result;
       }
Create the DuoAuth view and add the following, You will need to get your api key from your Duo admin panel and replace the default key xxxxxxxxxxxx.duosecurity.com with your own. You can find that key under Applications –> Web SDK –> API hostname:
@{
    var sig_request = ViewBag.sig_request;
}

<div class="container text-center">
    <form method="POST" id="duo_form">
        <input type="hidden" name="isAuth" value="1" />
    </form>

    <iframe id="duo_iframe"></iframe>
    <style>
        #duo_iframe {
            width: 100%;
            min-width: 304px;
            max-width: 620px;
            height: 330px;
            border: none;
        }
    </style>

    <script src="~/js/Duo-Web-v2.js"></script>

    <script>
//Get the host value by logging into your Duo admin panel --> Applications --> Web SDK --> API hostname
    Duo.init({
        'host': 'xxxxxxxxxxxx.duosecurity.com',
        'sig_request': '@sig_request',
        'post_action': '..'
    });
    </script>
</div>
The DuoAuth View will produce the authentication panel similar the the one pictured below:
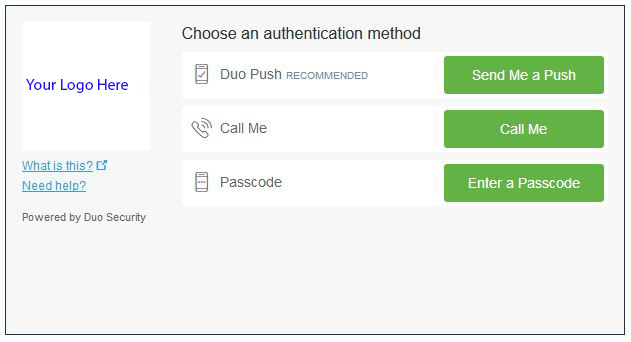
Try running your application now, if everything has been setup correctly you will see the DuoAuth page with the dialog box show above. Click on the “Send Me a Push” button to authenticate.
IP Address Whitelist – Policy
Okay, now that you have your application working, you may only want external users to see the DUO dialog. Fortunately DUO has various ways to create policies to handle this. You can either use a Global Policy to handle this or just use an Application Policy. I will be explaining the Application Policy method below.
1. From your DUO Admin panel, select Applications, then select “Web SDK“.
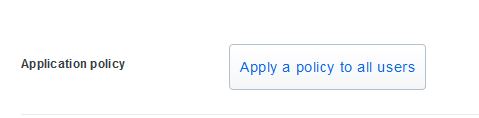
2. Scroll down to the Policy area.
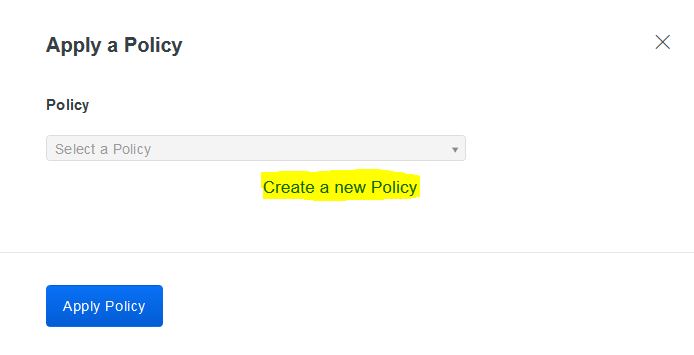
3. In the Application Policy section click on the “Apply a policy to all users“.
4. Click on the “Create a new Policy” link.
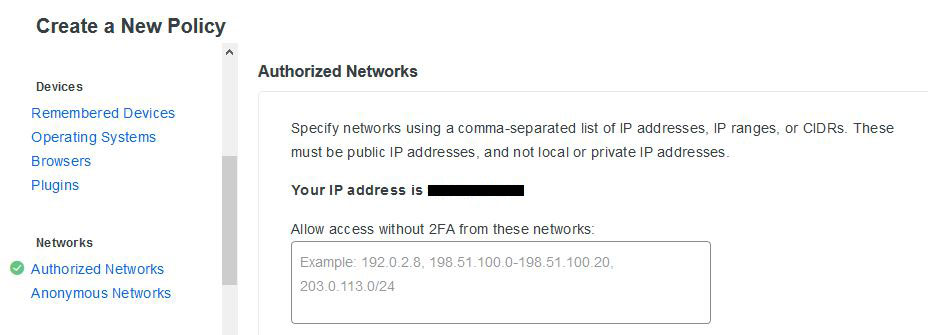
5. Fill in the “Policy Name“, maybe call it “IP Address Whitelist“, then scroll down to the Networks section and click on “Authorized Networks“. Then fill in the section “Allow access without 2FA from these networks“. Once you have added your IP Addresses or Address ranges then click on “Create Policy“.
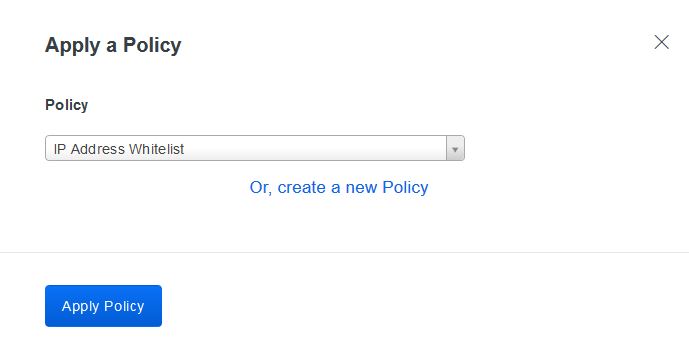
6. Click on the “Apply Policy” button to finish.
7. If you need to make any changes to this policy just return to this screen and click on the “Edit” link.
